For a while now I’ve run the cycle of getting inspired by an idea I’ve had for an app. I then do what programmers tend to do when inspired, start hacking away at the keyboard. I’m overwhelmed with excitement the first day, or week, coding relentlessly, unstoppable. Then something happens, sometimes unrelated, sometimes it’s just the passing of time but, imperceptibly, the motivation dies. I begin dabbling in other things, playing games, writing blogs or practising katas. And before I know it, I’ve near enough forgotten about the app I was building.
This weekend, I’ve decided enough is enough. I’m going to create something — no matter how small — and release it. So that’s what I did.
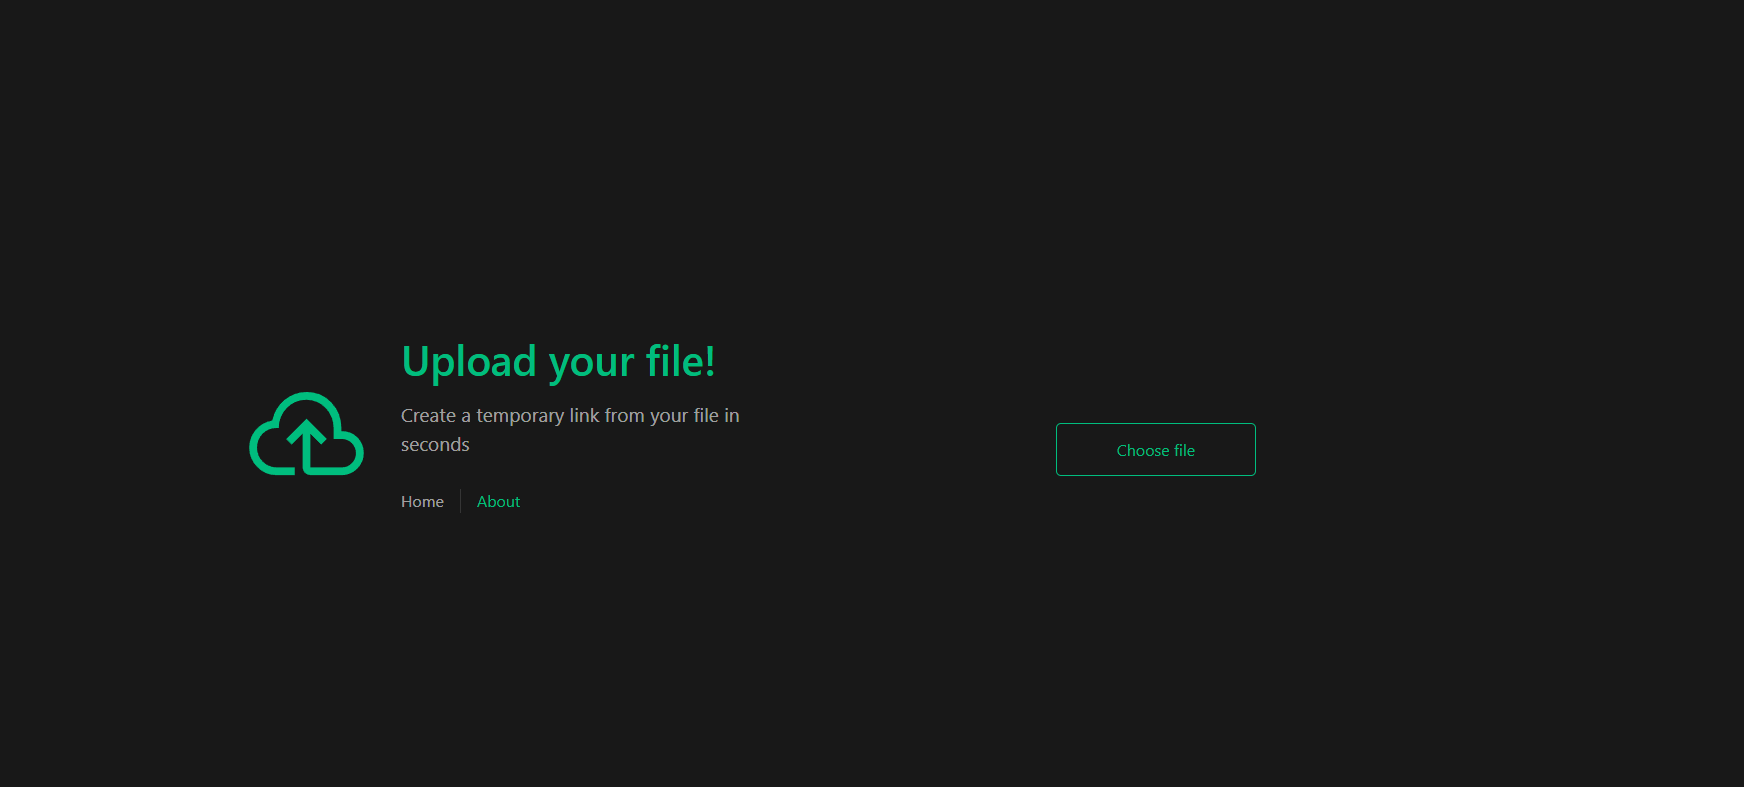
The idea
The idea sprang about because I wanted to have a play with S3 buckets in AWS as it’s something I need to get familiar with for work. As S3 buckets allow you to persist anything, why not do that, let’s allow for files to be uploaded and create a URL for the user so they can use it in their own apps. I know I would get a lot of value from a website where I can quickly/painlessly host files to allow for the creation of quick prototypes.
Some websites do this already, but they usually require a login or have an overly complicated dashboard. I simply want a page with a file upload button that’ll return me a shortish link. I also don’t mind if the files are persisted temporarily, usually, I need the file to be hosted so I can do a demo, or mock something up.
The frontend
I decided to spice things up a little and started this project with the frontend. I am using Vue 3, nothing special happening here, just a choose file button:
I added an event listener so that when a file is added we automatically start the upload:
 uploader.addEventListener("change", () => {
      const file = uploader.files?.item(0);
      if (file.size > import.meta.env.VITE_MAX_SIZE) {
        const toast = useToast();
        toast.error(`The file is too big, max ${getFileMaxSizeInMB()}`);
      } else {
        upload();
      }
    });
And of course,there’s a limit to the size of the files I’m allowing to be uploaded, I don’t have a bottomless pit of ? This limit is set to the environment variable VITE_MAX_SIZE which I intend to mirror in the backend.
The upload function looks like following if you’re interested:
async function upload() {
  uploading.value = true;
  const uploader = document.getElementById("fileUpload") as HTMLInputElement;

  if (uploader) {
    const file = uploader.files?.item(0);
    var formData = new FormData();
    formData.append("image", file);

    const response = await axios.post(`${import.meta.env.VITE_APP_SERVER}/api/files`,formData,{
        headers: {
          "Content-Type": "file",
        },
      }
    );

    uploading.value = false;
    url.value = response.data.url;
    fileSelected.value = true;
  }
}
With the API stubbed and the upload function ready, it’s time to crack on with the backend.
The backend
Whilst coding up the frontend, I realised it’s probably not the wisest decision to deploy an application where people can upload as many files as they like. So rather than using S3 buckets, I’ve decided to use Azure blob storage as I have an MSDN subscription where I get a monthly limit on the compute I use. So if I use over the limit, then the application will just stop working, which probably isn’t ideal but at least I’m not paying anything ?
Also, I’ll add some barriers to prevent spam uploading that I’ll talk about in another blog.
So anyway, I’m using Azure functions — the serverless architecture I have the most experience with — to create the upload functionality.
The upload API needs to take in a file, and persist it to Azure blob storage.
Persisting in Azure blob storage
To interact with Azure blob storage I’m using the Azure.storage.blobs NuGet package. I did the following to persist the files:
var connection = Environment.GetEnvironmentVariable("AzureWebJobsStorage");
var containerName = Environment.GetEnvironmentVariable("ContainerName");

var blobClient = new BlobContainerClient(connection, containerName);
var blob = blobClient.GetBlobClient(fileName);
var blobHttpHeader = new BlobHttpHeaders { ContentType = file.ContentType };
await blob.UploadAsync( file.OpenReadStream(), new BlobUploadOptions { HttpHeaders = blobHttpHeader });
Create the blob container client using the AzureWebJobsStorage app setting, this is simply the key from the storage account in Azure. The container name is — you guessed it — the container name, in my scenario I created a new container in my storage account called file-upload. To preserve the content-type I had to create a BlobHttpHeader with the content type from the file attached.
Creating a file name I wanted to create something unique and short so I generated a GUID, substringed it to 6 characters and stripped any base64ish characters that don’t work too cracky in URLs:
var base64Guid = Convert.ToBase64String(Guid.NewGuid().ToByteArray())
       .Substring(0, 6)
       .Replace("+", "")
       .Replace("/", "")
       .Replace("=", "");
var extension = file.FileName.Split(".")[1];
var fileName = $"{base64Guid}.{extension}";
If you’re interested in how base64 works take a look at a previous blog I’ve done.
Fetching the file
To fetch a file all that’s required is the id, which the user is presented with from the Upload response.
  [FunctionName("GetFile")]
    public static async Task<IActionResult> RunAsync(
        [HttpTrigger(AuthorizationLevel.Anonymous,  "get", Route = "f/{id}")] HttpRequest req, ILogger log, string id)
    {
        log.LogInformation("C# HTTP trigger function processed a request.");
        var connection = Environment.GetEnvironmentVariable("AzureWebJobsStorage");
        var containerName = Environment.GetEnvironmentVariable("ContainerName");
        var containerClient = new BlobContainerClient(connection, containerName);
        var blobClient = containerClient.GetBlobClient(id);
        var r = await blobClient.DownloadAsync();
        var data = ReadFully(r.Value.Content);
        return new InlineFileContentResult(data, r.Value.ContentType);
    }
When the user clicks the file I don’t want the file to automatically download, I want it to display in the browser if at all possible. <a href="https://developer.mozilla.org/en-US/docs/Web/HTTP/Headers/Content-Disposition">content-disposition</a> is a response header which tells the browser what to do with the response. There are two types:
- Attachment: download the content and save it locally
- Inline: display the content inline in the browser
So, if it has the content-type image/jpeg if inline is set as the content-disposition response header then it will display the image in the browser.
I had to add some code to override the content result and set the content-disposition response header:
public class InlineFileContentResult : FileContentResult
{
    public InlineFileContentResult(byte[] fileContents, string contentType)
        : base(fileContents, contentType)
    {
    }

    public override Task ExecuteResultAsync(ActionContext context)
    {
        var contentDispositionHeader = new ContentDispositionHeaderValue("inline");
        contentDispositionHeader.SetHttpFileName(FileDownloadName);
        context.HttpContext.Response.Headers.Add(HeaderNames.ContentDisposition, contentDispositionHeader.ToString());
        FileDownloadName = null;
        return base.ExecuteResultAsync(context);
    }
}
File2url.com
I bought the domain name file2url.com. I’m using Netlify — which I can’t recommend enough — to serve up the frontend. Setting the certificate and updating the google DNS is so quick and easy. To point my domain to my Netlify app all I needed to do was create an A record in Google Domains pointing to the IP Netlify provides.
I want the URL of my function app to be relatively small, I don’t want to fork out for another domain so I created a subdomain and then pointed it to the azure function:

To configure this in Azure on the function app | Custom Domains | Add custom domain. It then provides you with a txt and the CNAME (above) to update your DNS records with. The last step is to add a cert, I did this by adding an app service managed certificate.
With everything deployed I now have a running website! – I’ve since removed this website, it was fun while it lasted!
It feels good to have finished a project, even if it is very small. And by finish I mean deployed, the work continues, there’s plenty more to do!
And that’s pretty much all there is to it, if you liked this blog then please sign up for my newsletter and join an awesome community!